
Tile Backsplash Installation
Small area, high visibility — every cut, every grout line, every edge is on display at eye level. Rainwood Construction handles tile backsplash installation with the layout precision and detail work the space demands.
We respond within 24 hours
Why Backsplash Tile Is All About the Details
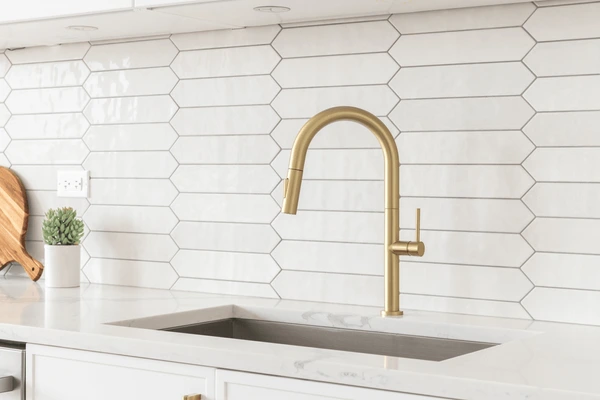
A backsplash is typically 18” from counter to uppers — not much area. But it’s the most scrutinized surface in the kitchen. You stare at it while cooking, cleaning, standing at the sink.
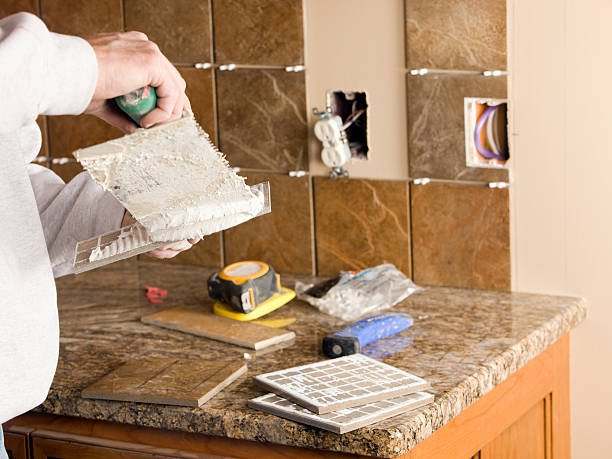
That’s why layout matters more here than on any floor. Center the pattern on the focal point — range or sink — not from the corner. Cuts should fall at cabinet ends, not in the middle of a window return. Outlet boxes need precise notching with an oscillating tool, not rough cuts from a tile saw. Tile backer board installation behind a backsplash is simpler than a shower — no membrane in a dry zone — but the substrate still has to be flat or the tile telegraphs every dip.
Most backsplash callbacks we see aren’t material failures. They’re layout problems — uneven spacing, visible cuts in the wrong spots, grout lines that don’t align with the counter edge.
Tile Backsplash Installation Cost
Tile backsplash installation cost per square foot runs $15–30 installed for ceramic or porcelain subway. Glass tile: $25–45/sq ft. Natural stone or marble: $30–55/sq ft. Mosaic sheets land in between depending on material — glass mosaic is pricier than ceramic mosaic.
Tile backsplash installation labor cost per square foot runs higher than floors — outlet cuts, window returns, edge trim, inside corners. A 30 sq ft backsplash has more detail cuts per square foot than a 200 sq ft floor. Standard kitchen (30–45 sq ft): $800–2,000 in ceramic subway. Full-height or natural stone: $2,000–4,500. Rainwood Construction quotes on-site — layout complexity drives the number.
OUR TILE SERVICES
What Rainwood Construction covers for backsplash tile installation projects.
Kitchen Backsplash Tile Installation
Counter-to-cabinet or full-height counter-to-ceiling. Kitchen backsplash tile installation in ceramic, porcelain, glass, or stone. We dry-lay the full pattern before setting — cuts land at cabinet edges, not focal points. Outlets get precise box cuts. Window returns get mitered or bullnose treatment. Schluter Jolly trim at exposed edges.
Subway Tile Backsplash Installation
Classic 3×6 running bond, stacked, or herringbone. Subway tile backsplash installation is the most common request — and the one where grout line straightness is most obvious. We use laser level, consistent spacers, and start from a level line — not from the counter, which is almost never perfectly level.
Glass Tile Backsplash Installation
Glass tile backsplash installation requires white thin-set — standard grey shows through translucent and frosted glass. Grout joints tighter than ceramic: 1/16” is standard. Glass doesn’t absorb, so modified thin-set with extended open time is mandatory. We score and snap small formats, wet-cut anything over 4”.
Mosaic Tile Backsplash Installation
Sheet-mounted mosaics in glass, ceramic, stone, or mixed media. Mosaic tile backsplash installation is about sheet alignment — joints between sheets have to match joints within sheets or the pattern breaks. Herringbone tile backsplash installation and basketweave follow the same principle: one continuous surface, not patchwork.
Stone & Marble Backsplash Installation
Stone & Marble Backsplash Installation
Marble subway, travertine, slate, quartzite. Stone tile backsplash installation adds sealing — marble stains fast near a cooktop. We seal before grouting (grout pigment stains unsealed stone) and again after. Marble tile backsplash installation uses unsanded grout on polished surfaces to avoid scratching.
Rainwood also offers interior renovations. Contact us to discuss your project.
See Our Work in Action
Watch how we transform homes with quality siding installation.
COMMON PROBLEMS WE FIX
Backsplash tile problems we see on kitchen and bathroom calls.
Uneven grout lines at eye level — no laser level, inconsistent spacers, started from unlevel counter
Rough outlet cuts with chipped edges — tile saw instead of oscillating tool or diamond bit
Glass tile cracking after install — grey thin-set shrinking behind translucent tile
Grout staining on natural stone — marble not sealed before grouting
Exposed tile edge at open wall ends — no edge trim (Schluter Jolly, Rondec, or bullnose)
WHY CHOOSE RAINWOOD CONSTRUCTION?
Backsplash tile installation is detail work at eye level. Every shortcut shows. Rainwood Construction dry-lays before setting, uses laser-level alignment, and treats every outlet and window return as a finish detail.
- Full dry-lay before any thin-set — pattern centered on focal point, cuts planned at cabinet edges
- Laser-level start line on every row — counter tops aren’t level, we don’t follow them
- White thin-set on all glass tile — grey shows through and ruins the finish
- Stone sealed before and after grouting — no grout pigment staining
10+
Years Experience
Great people. Showed up early and stayed late to get the job done. Work was excellent. Price was the best i found after four quotes. Would definitely use this company again.

We hired Rainwood Construction LLC to replace our French doors, and the result was outstanding. We knew going in this was more involved than a standard swap — we switched from inward to outward swinging doors, requiring extra attention to framing, flashing, and weatherproofing to keep everything sealed against water intrusion.Anatoliy was our point of contact and led the project from before to after, making sure the swing change and weatherproofing were planned and executed correctly. Igor and Vitaly handled the on-site installation and did excellent, high-quality work. The whole team was on time, professional, and delivered top-notch results. Can’t recommend them highly enough. 5 stars!

Every member of this crew I've had the pleasure of coming in contact with has been professional, excellent in their skillset, and fast. Pricing was reasonable for the excellent job they did.Last year we hired Rainwood to do plumbing and painting for a job. Both crews did such a great job, were thorough, and the level of detail was fantastic!We liked them so much we recently hired them for a quick job (installing ceiling fans). We messaged on a Wednesday and the job was done by Friday.Will absolutely hire Rainwood again and again for every job we do for our home.

Working with Rainwood Constructions on our house remodel was an excellent experience from start to finish. Their contractors were highly professional, skilled, and attentive to detail, and the quality of their work exceeded our expectations. The team communicated clearly throughout the project and ensured everything was completed on time without compromising quality. We’re extremely happy with the results and would highly recommend them to anyone planning a home remodel.

We had a very good experience with Rainwood Construction LLC and Toli during my brother’s home construction project in Shoreline. The team was professional, communicative, and paid close attention to detail throughout the process. We were especially happy with the quality of the fittings and finishing work, which turned out really well. The project was handled smoothly, and the overall workmanship met our expectations. Would definitely recommend them to others looking for reliable construction services.

We had an excellent experience with them on our sunroom project. The quality of the work was outstanding, they were easy to work with, and they clearly explained each step, the schedule, and key decisions (with various options to help us understand cost) along the way. Communication was solid from start to finish, and the final result looks great. Highly recommend, they are my new go to recommendation when friends ask.

OUR RECENT PROJECTS
From first contact to final walkthrough, we make siding projects straightforward and stress-free.
Request a Quote
Call or fill out the form. Tell us the tile you’re considering, the kitchen layout, and whether it’s counter-to-cabinet or full-height. Photos of the wall help.
On-Site Assessment
We measure the wall, check for flat and plumb, locate outlets and switches, and assess substrate. Written scope with layout plan.
Clear Scope & Schedule
Tile, pattern, edge trim, grout color, line-item labor and material. Most backsplash installs run 1–3 working days depending on area and material.
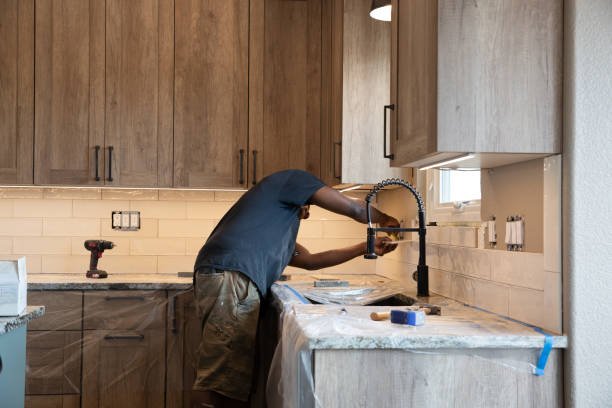
Installation
Substrate prep, dry-lay, thin-set, tile, cure, grout, caulk at counter joint, seal if stone. Walkthrough before we leave.
Ready to Get Started?
Contact us today for a free on-site assessment. We’re here to help protect your home.
Call us now
425-750-1025
Email us
Anatoliy@rainwoodconstruction.com
Visit us
12310 Hwy 99, Everett, WA 98204
Hours
Mon-Fri 9:00 am–6:00 pm, Sat 11:00 am–5:00 pm, Sun Closed
FAQ
Ceramic or porcelain subway: $800–2,000 for a typical 30–45 sq ft kitchen. Glass: $1,200–2,800. Natural stone: $1,500–4,500. Full-height counter-to-ceiling adds area and detail cuts. Layout complexity — outlets, windows, open ends — affects labor more than tile price.
Most kitchen backsplashes: 1–2 days. One day for prep and setting tile, second day for grout and seal. Full-height backsplash or stone with multiple edge profiles: 2–3 days. Thin-set needs overnight cure before grouting — we don’t rush that step.
Depends on what’s there. Drywall in good condition works fine for a dry-zone backsplash — no waterproofing needed. If drywall is damaged or uneven, we skim-coat or install 1/4” cement board. Behind a range where heat and grease are factors, cement board is the better substrate.
Possible if existing tile is flat and well-bonded. We scarify the surface (mechanically rough it up) and use bonding thin-set. But most clients prefer removing — it’s a small area, demo is fast, and starting fresh gives cleaner results at outlets and counter joints.