Cedar Siding Installation
Nothing looks like real cedar. Nothing weathers like it either. Rainwood Construction installs cedar lap, shingle, shake, and vertical profiles with the wall detailing that keeps the wood dry.
We respond within 24 hours
Why Cedar — and What It Demands
Cedar is the only siding that gets better-looking with age — assuming you want that silver-grey patina. Western red cedar heartwood contains natural thujaplicins that resist rot and insects without treatment. That’s why it lasts 30+ years on properly detailed walls while pine and fir fail in under ten.
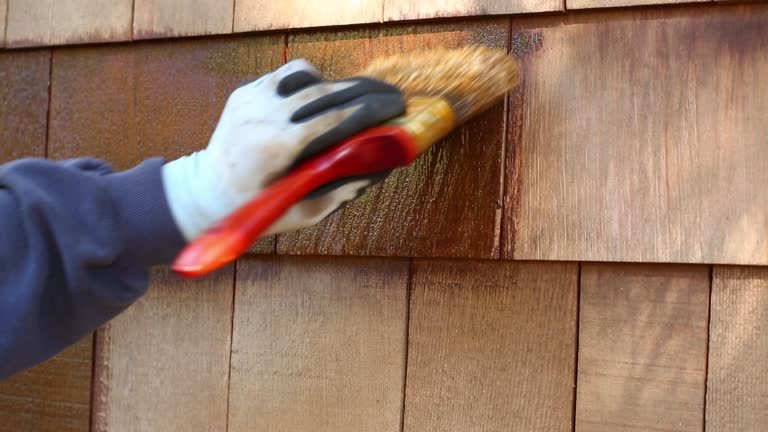
But cedar is high-maintenance. Left unfinished, it weathers unevenly — north elevations grey while south walls crack from UV. Stained cedar needs recoating every 3–5 years. Paint buys 7–10 years but hides the grain.
The bigger risk is moisture. Cedar absorbs water — in the PNW, that’s the central problem. Without a rain screen gap, back-priming, and flashing at every transition, cedar traps moisture against sheathing. Rot starts from behind. By the time you see it, the wall is compromised.

Cedar Siding Installation Cost
Material depends on profile and grade. CVG western red cedar bevel siding runs $4–7 per square foot. Shingles $3–5. Shakes $5–8. Knotty grades cost less but weather unpredictably around knots.
Installed with rain screen furring, house wrap, flashing, and finish — expect $8–14 per square foot. Double fiber cement, triple vinyl. A 1,500 sq ft home in cedar bevel lands $14,000–22,000 depending on grade and wall condition.
No manufactured material matches cedar’s depth. But maintenance is real. Rainwood Construction walks through lifecycle cost at every estimate — not just install day, but years 5, 10, and 20.
OUR SIDING SERVICES
What Rainwood Construction covers for cedar siding installation projects.
Cedar Lap Siding Installation
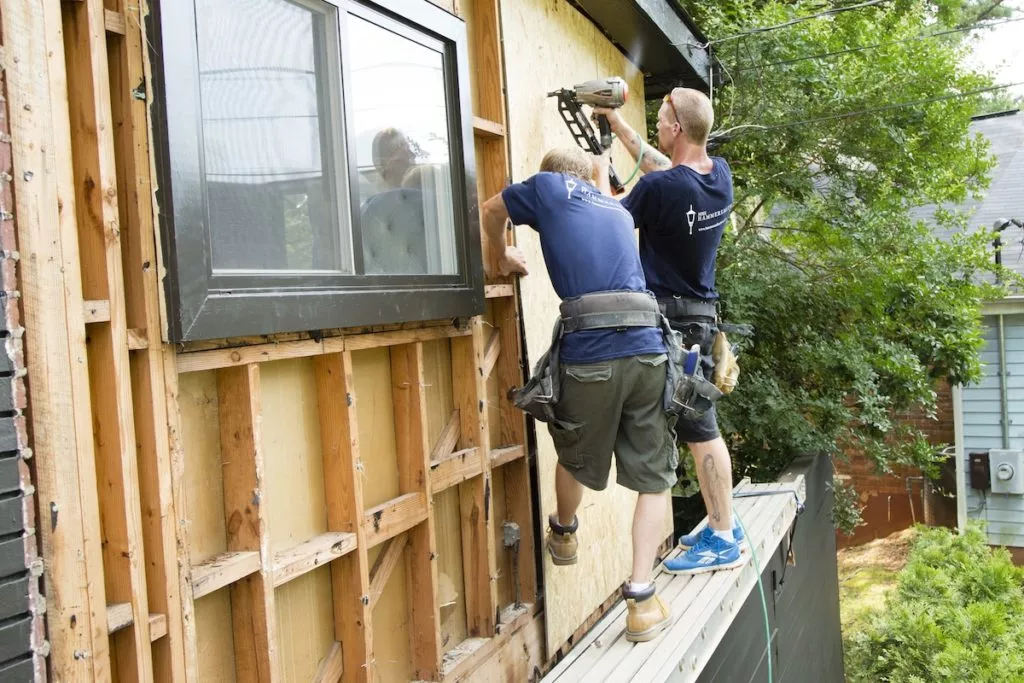
Cedar bevel siding — traditional horizontal profile, thick at bottom, tapered top. We install over a vented rain screen using 3/8" furring strips for drainage and drying. Every board back-primed before install. Stainless steel ring-shank nails only — galvanized stains cedar with black tannin streaks within one season.
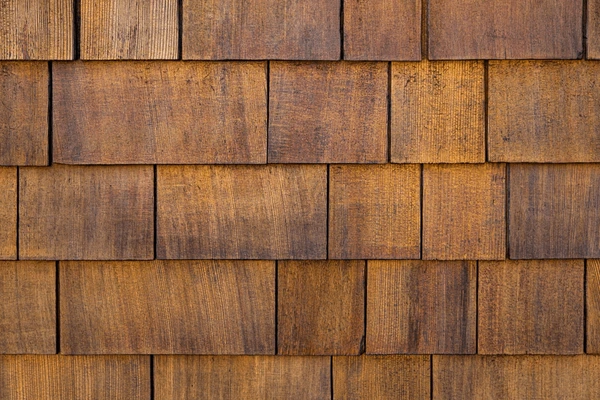
Cedar Shake & Shingle Siding Installation
Cedar shake siding installation uses hand-split or taper-sawn shakes for heavy shadow lines. Cedar shingle siding installation uses machine-sawn shingles for a tighter face. Both need double-coursing on walls and rain screen behind. Exposure varies — 16" shingles get 7½" max per course.
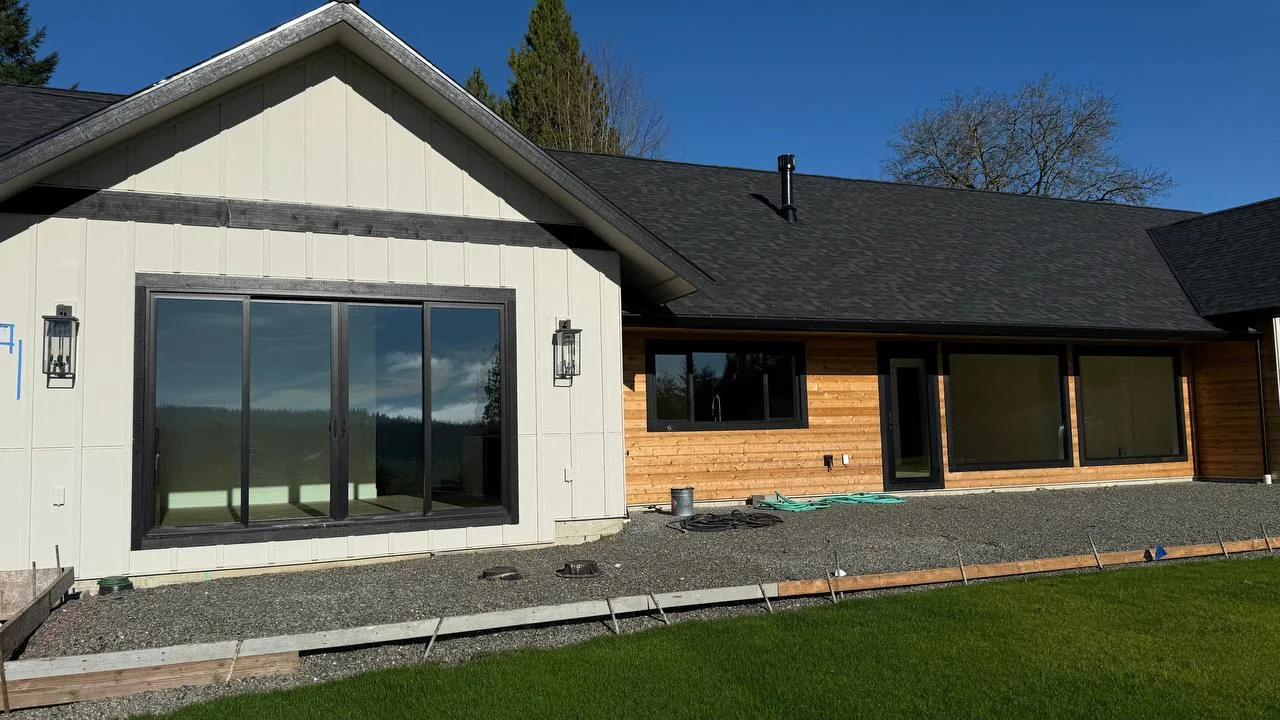
Vertical Cedar Siding Installation
Tongue-and-groove, board-and-batten, or channel rustic running vertically. Vertical cedar siding installation needs horizontal blocking or furring for nail-base and ventilation. Common on contemporary and farmhouse builds. Horizontal butt joints at board ends are the weak point — every one gets back-flashed and sealed.
Vinyl Cedar Shake Siding
Not every budget fits real wood. Vinyl cedar shake siding installation uses polymer panels molded from actual cedar masters — Polymer shake panels molded from actual cedar masters are our most-installed vinyl cedar option. Costs ~40% less than real shake, never needs staining. A practical middle ground for the cedar look without cedar upkeep.
Cedar Siding Repair & Restoration
Spot replacement of rotted boards, re-staining, re-caulking. Cedar repair means finding the rot source. Three soft boards at a window corner? The problem is the flashing. We fix the cause, then replace the wood.
Rainwood also offers interior renovations. Contact us to discuss your project.
See Our Work in Action
Watch how we transform homes with quality siding installation.
COMMON PROBLEMS WE FIX
Cedar failures we see on job sites — almost always moisture-related.
Cedar Siding in Its Home Climate
Western red cedar grows in the forests around Puget Sound — this is literally its home climate, and it has protected Northwest buildings for generations. But native doesn’t mean maintenance-free. Cedar performs here when the installation lets it breathe: a ventilated gap behind the boards so both faces can dry, stainless fasteners that won’t streak the wood, and breathable stains rather than film-forming paints that trap moisture and peel.
Orientation matters more with cedar than with any other siding. South and west walls take sun and wind-driven rain; north walls stay shaded and dry slowly, which is where finishes fail first. We detail and finish each elevation for its actual exposure, and we’re honest about the refinishing rhythm cedar needs in this climate — because a cedar wall maintained on schedule is one of the longest-lasting and best-looking exteriors in the Northwest.
- Ventilated rainscreen-style installation so cedar dries from both sides
- Stainless steel fasteners — no black streaking on wet wood
- Breathable penetrating finishes matched to each wall’s exposure
- Clear guidance on a realistic maintenance schedule for this climate
Why Choose Rainwood?
Cedar siding installation best practices aren’t complicated — just frequently skipped. Rain screen gap, back-priming, stainless fasteners, proper flashing. Every step adds cost. Every step is the difference between cedar that lasts 30 years and cedar that rots in 8.
- Rain screen furring on every cedar job — no exceptions, even on re-side
- Back-priming all six sides of every board before installation
- Stainless steel ring-shank nails — no galvanized, no tannin bleed
- Full flashing detail at windows, doors, corners, and roof-to-wall
10+
Years Experience
Great people. Showed up early and stayed late to get the job done. Work was excellent. Price was the best i found after four quotes. Would definitely use this company again.

We hired Rainwood Construction LLC to replace our French doors, and the result was outstanding. We knew going in this was more involved than a standard swap — we switched from inward to outward swinging doors, requiring extra attention to framing, flashing, and weatherproofing to keep everything sealed against water intrusion.Anatoliy was our point of contact and led the project from before to after, making sure the swing change and weatherproofing were planned and executed correctly. Igor and Vitaly handled the on-site installation and did excellent, high-quality work. The whole team was on time, professional, and delivered top-notch results. Can’t recommend them highly enough. 5 stars!

Every member of this crew I've had the pleasure of coming in contact with has been professional, excellent in their skillset, and fast. Pricing was reasonable for the excellent job they did.Last year we hired Rainwood to do plumbing and painting for a job. Both crews did such a great job, were thorough, and the level of detail was fantastic!We liked them so much we recently hired them for a quick job (installing ceiling fans). We messaged on a Wednesday and the job was done by Friday.Will absolutely hire Rainwood again and again for every job we do for our home.

Working with Rainwood Constructions on our house remodel was an excellent experience from start to finish. Their contractors were highly professional, skilled, and attentive to detail, and the quality of their work exceeded our expectations. The team communicated clearly throughout the project and ensured everything was completed on time without compromising quality. We’re extremely happy with the results and would highly recommend them to anyone planning a home remodel.

We had a very good experience with Rainwood Construction LLC and Toli during my brother’s home construction project in Shoreline. The team was professional, communicative, and paid close attention to detail throughout the process. We were especially happy with the quality of the fittings and finishing work, which turned out really well. The project was handled smoothly, and the overall workmanship met our expectations. Would definitely recommend them to others looking for reliable construction services.

We had an excellent experience with them on our sunroom project. The quality of the work was outstanding, they were easy to work with, and they clearly explained each step, the schedule, and key decisions (with various options to help us understand cost) along the way. Communication was solid from start to finish, and the final result looks great. Highly recommend, they are my new go to recommendation when friends ask.

Our Simple Process
Recent cedar siding installation work by Rainwood Construction.
Request a Quote
Call or fill out the form. We'll set up a time to walk the property.
On-Site Assessment
Moisture meter on all elevations, probing at windows and bottom courses. We check existing rain screen detail (or lack of it). Written report — yours to keep.
Clear Scope & Schedule
Cedar species, grade, profile, finish, rain screen spec, labor breakdown. Most cedar re-sides run 8–14 working days — longer than other materials due to back-priming, rain screen build-out, and staining.
Installation
Tear-off, wall repair, WRB, rain screen furring, flashing, siding, trim, stain or seal, cleanup. Walkthrough before closeout.
Ready to Get Started?
Contact us today for a free on-site assessment. We’re here to help protect your home.
Call us now
425-750-1025
Email us
Anatoliy@rainwoodconstruction.com
Visit us
12310 Hwy 99, Everett, WA 98204
Hours
Mon-Fri 9:00 am–6:00 pm, Sat 11:00 am–5:00 pm, Sun Closed
FAQ
Western red cedar heartwood lasts 30–40 years with rain screen, back-priming, and stainless fasteners. The finish needs attention — penetrating stain every 3–5 years, or paint every 7–10. The wood outlives the finish by decades if moisture is managed.
Shakes are thicker, hand-split or taper-sawn, rough face with heavy shadow lines. Shingles are thinner, machine-sawn, smooth and uniform. Both work on walls. Shakes cost more and look more rustic. Shingles give a tighter, cleaner line.
Cedar siding installation cost runs 50–100% more than fiber cement. You’re paying for real grain no factory product replicates — and signing up for maintenance. Want the look without upkeep? Vinyl cedar shake or wood-grain fiber cement are the alternatives.
In the Pacific Northwest — absolutely. Cedar absorbs moisture. Without an air gap between siding and WRB, water sits against sheathing and rot starts within years. We install 3/8″ furring on every cedar job for drainage and drying. Not optional here.