Tile Installation
Tile flooring lasts decades when the substrate is right and the setting method matches the material. Rainwood Construction handles tile floor installation in porcelain, ceramic, natural stone, and large-format profiles across residential and commercial projects in the greater Seattle area.
We respond within 24 hours
Why Tile Floors Fail — And It’s Rarely the Tile
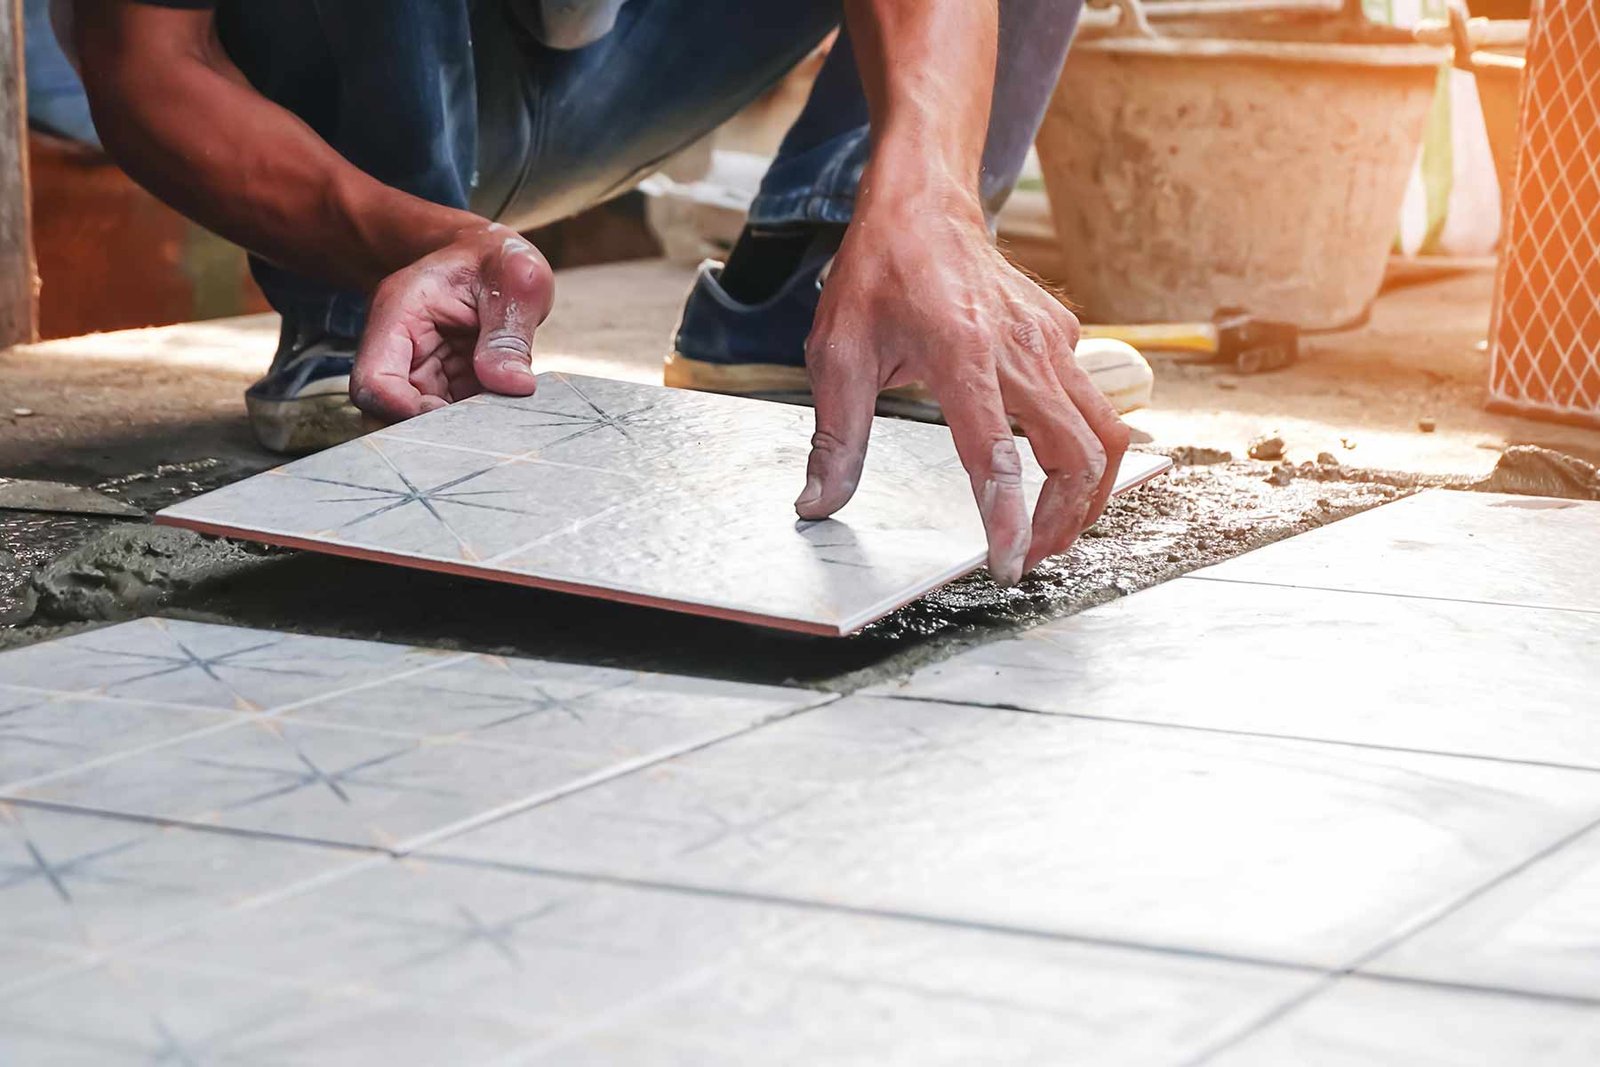
Cracked grout, loose tiles, lippage you catch with your toe — these aren’t tile problems. They’re substrate problems. A tile floor is only as stable as what’s underneath it. Plywood subfloor with too much deflection cracks grout within a year. Concrete slab with moisture vapor pushing through delaminates the thinset bond. Floor tile installation on a surface that isn’t flat within 1/8″ over 10 feet guarantees lippage on anything larger than 12×12.
That’s why tile flooring installation starts with the floor under the floor. We check deflection per TCNA (Tile Council of North America) standards — if the subfloor bounces, it gets a layer of cement board or an uncoupling membrane like Schluter DITRA before any thinset goes down. On concrete, we run a calcium chloride moisture test. Above 3 lbs per 1,000 sq ft over 24 hours, we apply a moisture mitigation system before setting. Skip that step and the tile looks perfect for eight months — then tiles start popping off one by one. Fixing a debonded floor means tearing out every tile in the affected area, not just the loose ones, because the problem is the bond layer, not the individual tile.
Tile Floor Installation Cost
Tile floor installation cost depends on three variables: the tile, the substrate, and the pattern. Standard ceramic or porcelain in a straight-lay or offset pattern on a prepared surface: $8–$14 per square foot installed. That covers material, thinset, grout, and labor. Porcelain tile flooring installation in large-format (24×24 or 12×48 plank) adds $2–$4/sq ft because leveling clips are mandatory and coverage requirements go up. Natural stone — marble, travertine, slate — runs $15–$30/sq ft installed depending on the stone and how much cutting the layout demands.
Floor tile installation cost per square foot climbs further with pattern complexity. Herringbone and chevron patterns roughly double the cut count versus a standard offset. Diagonal layouts add 15–20% waste. A 200-square-foot kitchen floor in porcelain at a straight offset: $2,000–$3,500. Same kitchen in herringbone with marble tile: $5,000–$9,000. Where the estimate really shifts is substrate prep. Adding cement board over plywood runs $2–$3/sq ft. A self-leveling compound pour on uneven concrete: $3–$5/sq ft. Moisture mitigation on a slab: $2–$4/sq ft. These aren’t optional line items — they’re what determines whether the floor lasts 5 years or 25.
OUR TILE FLOOR SERVICES
What Rainwood Construction covers for tile flooring installation projects.
Ceramic & Porcelain Tile Floor Installation
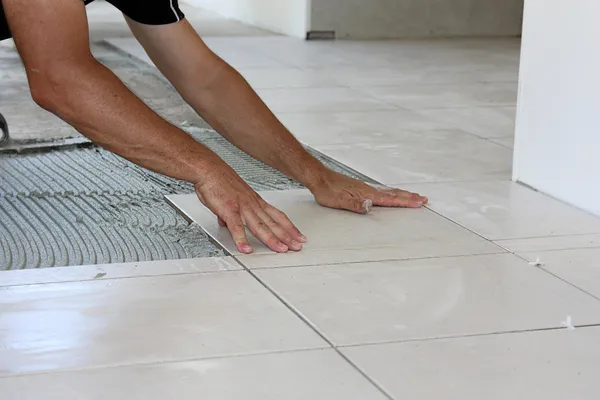
The core of residential and commercial tile work. Ceramic tile flooring installation suits bathrooms, laundry rooms, and entryways. Porcelain floor tile installation handles kitchens, living areas, and commercial spaces where higher PEI wear ratings matter — we spec PEI 4 or 5 for any floor with foot traffic. We set with modified thinset, use leveling clips on any tile with an edge longer than 15 inches, and size grout joints to the tile: 1/8" for rectified, 3/16" for pressed edges. On concrete slabs, every project starts with a moisture test — that's the step that separates a 20-year floor from a 2-year callback.
Kitchen & Living Area Tile Floors
Kitchen floor tile installation deals with more transitions than any other room — tile to hardwood at the dining room, tile to LVP at the family room, a threshold at the exterior door. We plan every transition before setting starts because a reducer strip added as an afterthought never sits right. Living area tile in wood-look plank porcelain (6×36 or 8×48 formats) has become one of our most requested floor tile installation patterns — one-third offset, staggered joints, running bond.
Shower Floor Tile Installation
hower floors are their own category. Shower floor tile installation requires a pre-sloped mortar bed or bonded foam pan under the waterproof membrane, with the tile — usually 2×2 mosaic or small-format hexagon — set to fall toward the drain at 1/4" per foot. Pebble tile shower floor installation needs extra thinset work because each stone sits at a different height and grout fills the gaps between irregular surfaces. Full waterproofing protocol for showers is covered under our bathroom tile installation scope.
Heated Tile Floor Installation
Electric radiant heat mats (Nuheat, Schluter DITRA-HEAT, SunTouch) embedded in the thinset layer under tile. Heated tile floor installation adds warmth to bathroom and kitchen floors without ductwork. The mats lay over the substrate and get set into the thinset — meaning the floor tile goes directly on top. We run a resistance check on the heating cable before and after thinset application to verify no damage during installation. Thermostat placement and dedicated circuit wiring get planned during rough-in, not after the tile is done.
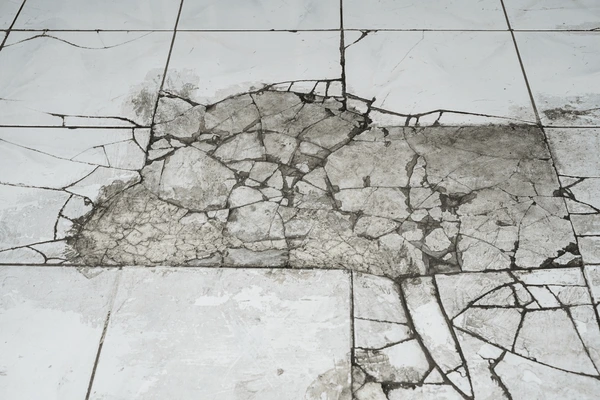
ile Floor Repair & Replacement
Cracked tiles, hollow tiles, grout failure, tiles debonding from substrate. We assess whether the failure is localized (one cracked tile from impact) or systemic (bond failure across a section from moisture or deflection). Localized repairs get matched tile and regrouted. Systemic failures need tear-out to the substrate and a proper rebuild — there's no patch for a bad bond layer.
Rainwood also offers interior renovations. Contact us to discuss your project.
See Our Work in Action
Watch how we transform homes with quality siding installation.
COMMON PROBLEMS WE FIX
ssues we see on tile floors installed by others.
WHY CHOOSE RAINWOOD CONSTRUCTION?
Tile flooring installation is substrate work first and tile work second. A floor that looks perfect on day one means nothing if the bond fails in year two. We test every condition before setting — and moisture is the one most installers skip because the equipment costs money and the test takes time.
- Calcium chloride moisture testing (ASTM F1869) on every concrete slab — above 3 lbs we won't tile until mitigation is in place, period
- Subfloor deflection calculated per TCNA handbook for the tile size being installed — if L/360 isn't met, we add cement board or uncoupling membrane
- Modified thinset matched to the tile and substrate — large-body porcelain gets LHT (large and heavy tile) mortar, not the same bag as a 6×6 ceramic
- Layout dry-fit and reviewed before any adhesive — cut placement, pattern alignment, and transition locations confirmed with the client
10+
Years Experience
Working with Rainwood Constructions on our house remodel was an excellent experience from start to finish. Their contractors were highly professional, skilled, and attentive to detail, and the quality of their work exceeded our expectations. The team communicated clearly throughout the project and ensured everything was completed on time without compromising quality. We’re extremely happy with the results and would highly recommend them to anyone planning a home remodel.

We had a very good experience with Rainwood Construction LLC and Toli during my brother’s home construction project in Shoreline. The team was professional, communicative, and paid close attention to detail throughout the process. We were especially happy with the quality of the fittings and finishing work, which turned out really well. The project was handled smoothly, and the overall workmanship met our expectations. Would definitely recommend them to others looking for reliable construction services.

We had an excellent experience with them on our sunroom project. The quality of the work was outstanding, they were easy to work with, and they clearly explained each step, the schedule, and key decisions (with various options to help us understand cost) along the way. Communication was solid from start to finish, and the final result looks great. Highly recommend, they are my new go to recommendation when friends ask.

Rainwood construction completed 2 projects in my home recently. The first, which was to add a bar in my family room, which when completed fit so well that it looked like it always belonged there. It came out exactly how we wanted it and we love it.The second project was to completely remodel and modernize my 1955 original kitchen. The kitchen turned out fantastic! It’s light and bright with clean lines exactly how we had envisioned it.The team was polite, competent, hard working and always cleaned up after themselves at the end of the day. They always made sure to ask how I wanted things done when there were options, making suggestions where needed and made sure I was happy with the completion of items along the way.I was very pleased with the quality of the work, plan to use them again in the future and have already recommended them!

Excellent work done ✅ I’m really impressed and looking forward working further. Recommend 👍

Anatoliy and his company, is great person to have a business with!!!

Our Simple Process
From first contact to final walkthrough, we make siding projects straightforward and stress-free.
Request a Quote
Call or fill out the form. Tell us the room, the approximate square footage, and whether you have tile picked out or need help selecting.
On-Site Assessment
We check the existing floor — substrate type, deflection, flatness, moisture levels on concrete. We measure transitions, note obstacles, and discuss layout options. Written scope with details.
Clear Scope & Schedule
Tile spec, layout drawing, substrate prep plan, transition details, line-item pricing, timeline. Most residential tile floor projects run 3–7 working days depending on area and complexity.
Installation & Finish
Substrate prep, membrane or cement board if needed, thinset and setting, grouting, sealing, transition strips, cleanup. Walkthrough before closeout.
Ready to Get Started?
Contact us today for a free on-site assessment. We’re here to help protect your home.
Call us now
425-750-1025
Email us
Anatoliy@rainwoodconstruction.com
Visit us
12310 Hwy 99, Everett, WA 98204
Hours
Mon-Fri 9:00 am–6:00 pm, Sat 11:00 am–5:00 pm, Sun Closed
FAQ
Ceramic floor tile installation cost runs $8–$14/sq ft for standard sizes in a basic pattern. Porcelain tile flooring installation cost sits in the same range for standard formats but adds $2–$4/sq ft for large-format planks or rectified tiles that need leveling systems. Natural stone — marble tile floor installation, travertine, slate — runs $15–$30/sq ft. These numbers include tile, thinset, grout, and labor. Substrate prep, demolition of existing flooring, and transitions are separate line items.
Over vinyl that’s fully bonded and flat — yes, with proper prep (scarify the surface, use modified thinset). Over existing tile — possible if the tile is solid (no hollow spots), level, and the added height doesn’t create problems at transitions. We test by tapping with a rubber mallet — any hollow sound means that tile isn’t bonded and the new layer will fail with it. Tile installation on concrete floor works well as long as the slab passes moisture testing and is flat within tolerance.
Straight lay (grid) is the fastest and produces the least waste. One-third offset is the most popular — each tile starts at one-third of the tile below, giving the floor movement without looking busy. Herringbone looks striking but doubles cutting time and waste. Diagonal layouts add 15–20% to material. The pattern should match the room — large open spaces handle herringbone well, narrow hallways look best with tiles running lengthwise, and small bathrooms benefit from larger tiles in a simple offset that makes the room feel bigger.
Heated tile floor installation adds roughly $10–$15 per square foot over a standard tile floor — that covers the heating mat, thermostat, dedicated electrical circuit, and the slightly longer setting process. A 50-square-foot bathroom floor with Schluter DITRA-HEAT or Nuheat: $500–$750 for the heating system on top of normal tile costs. The mats embed in the thinset layer, so there’s no added floor height. Worth it in bathrooms and kitchens with concrete slab — the difference between stepping onto a 58°F tile floor in January and a 75°F one is the kind of upgrade people actually notice every day.